안녕하세요 😁😁
오늘은 애플로그인을 구현해 볼거에요
SNS로그인을 구현해야한다면 꼭 같이 구현해줘야 하는 필수 로그인이죠
다른 SNS로그인과 달리 애플로그인은 보안적으로 좋다고 소개 하더라구요
프로젝트 생성을 먼저해보겠습니다

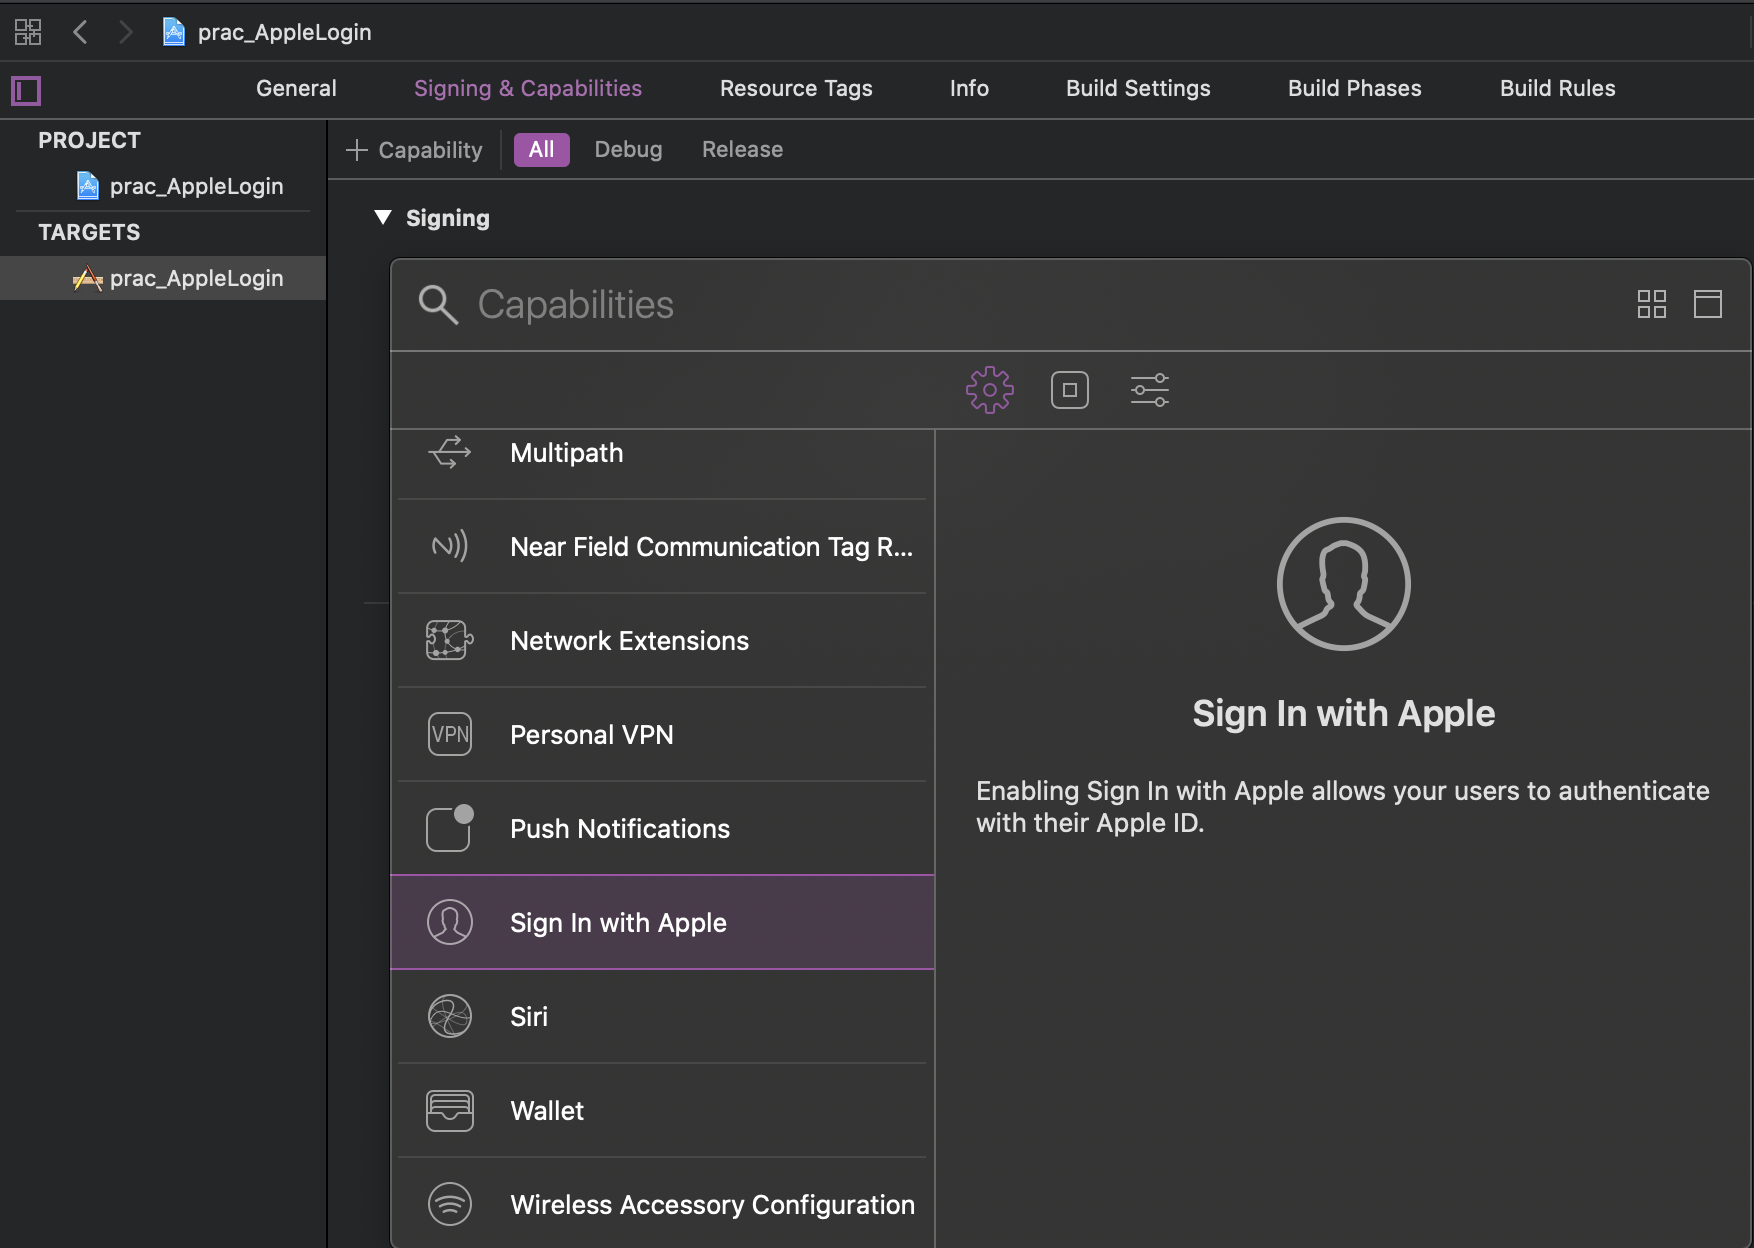
Signing & Capabilities에서
Sign In with Apple을 추가해주세요!!
하고나면 빨간 메시지가 보일거에요
왜냐하면 인증서에 추가를 해줘야 하기때문이에요!!
그럼 등록하러 가볼께요
에서 Account메뉴로 가서

로 들어가봅니다~~
Identifiers추가를 해볼게요

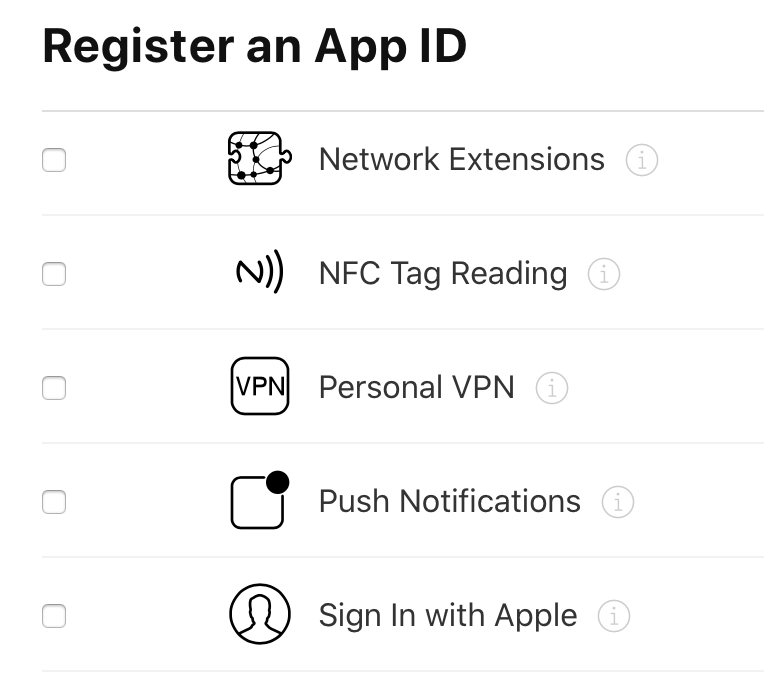
많은 목록중에서 Sign In with Apple 보이죠?? 저거를 체크!
Bundle Id도 써주고 나면
준비는 끝났습니다.
프로젝트로 다시 돌아와서 try again을 누르면 이제 빨간게 사라지죠
처음으로 우선 애플로그인을 사용하기위해서는

이렇게 프레임워크를 추가해줘야해요
공식문서를 보면서 코드를 따라쳤어요
아래의 testView는 제가 만들어준 View입니다!
공식문서에서는 stackView를 사용하고 있길레 위치를 잡는이유인것 같아서
로그인버튼의 위치를 잡아주는 용도로 View를 사용했어요
    func setupProviderLoginView() {
        let appleButton = ASAuthorizationAppleIDButton()
        appleButton.addTarget(self, action: #selector(handleAuthorizationAppleIDButtonPress), for: .touchUpInside)
        self.testView.addSubview(appleButton)

        appleButton.translatesAutoresizingMaskIntoConstraints = false
        appleButton.leadingAnchor.constraint(equalTo: testView.leadingAnchor).isActive = true
        appleButton.trailingAnchor.constraint(equalTo: testView.trailingAnchor).isActive = true
        appleButton.topAnchor.constraint(equalTo: testView.topAnchor).isActive = true
        appleButton.bottomAnchor.constraint(equalTo: testView.bottomAnchor).isActive = true
    }

    @objc
    func handleAuthorizationAppleIDButtonPress() {
        let appleIDProvider = ASAuthorizationAppleIDProvider()
        let request = appleIDProvider.createRequest()
        request.requestedScopes = [.fullName, .email]

        let authorizationController = ASAuthorizationController(authorizationRequests: [request])
        authorizationController.delegate = self
        authorizationController.presentationContextProvider = self
        authorizationController.performRequests()
    }

요구할수 있는 정보는 이렇게 두개뿐이구요,,,!
이렇게만하면 에러가 나타납니다
delegate와 provider를 추가하면 사라지는것들이에요
extension ViewController:
    ASAuthorizationControllerDelegate, ASAuthorizationControllerPresentationContextProviding {
    func presentationAnchor(for controller: ASAuthorizationController) -> ASPresentationAnchor {
        return self.view.window!
    }
}
이코드 또한 공식문서에 있는 그대로를 사용했어요
버튼의 속성으로는


(signIn/default),signUp,continue 순으로 실행 시킨 결과에요
버튼의 스타일로는


black, white, whiteOutline 순으로 실행 시킨 결과에요
black은 배경이 밝은색일 때
white는 배경이 어두울 때
whiteOutline는 배경이 밝을 때 사용하도록 권장하고 있어요

로그인 버튼을 누르면


잘 작동하네요!! 이제 로그인을 이용해서
데이터를 처리하거나
상태를 처리해봐야겠죠??
애플로그인 공식홈페이지 예제 - https://developer.apple.com/documentation/authenticationservices/implementing_user_authentication_with_sign_in_with_apple
Implementing User Authentication with Sign in with Apple | Apple Developer Documentation
Sample Code Implementing User Authentication with Sign in with Apple Provide a way for users of your app to set up an account and start using your services. Download Framework OverviewThis sample app, Juice, uses the AuthenticationServices framework to pro
developer.apple.com
'iyOmSd > Title: Swift' 카테고리의 다른 글
| [Swift] - 화면전환 애니메이션 커스텀: UIViewControllerAnimatedTransitioning (4) | 2020.04.25 |
|---|---|
| [Swift] - Apple Login (2/2) (1) | 2020.04.14 |
| [Swift] - MultiPart통신 (멀티파트 이미지업로드) (2) | 2020.04.11 |
| [Swift] XML 파싱 (0) | 2020.04.03 |
| [Swift] Font Custom ( 원하는 글자만 폰트적용하기 ) (0) | 2020.03.01 |