iOS13+에서 사용할수 있는 API구요
WWDC19에서 소개됬고
TableView 및 CollectionView의 데이터의 업데이트를 쉽게 도와주는 역할이에요
보통 사용하고 있는 DataSource를 이용한 방식은
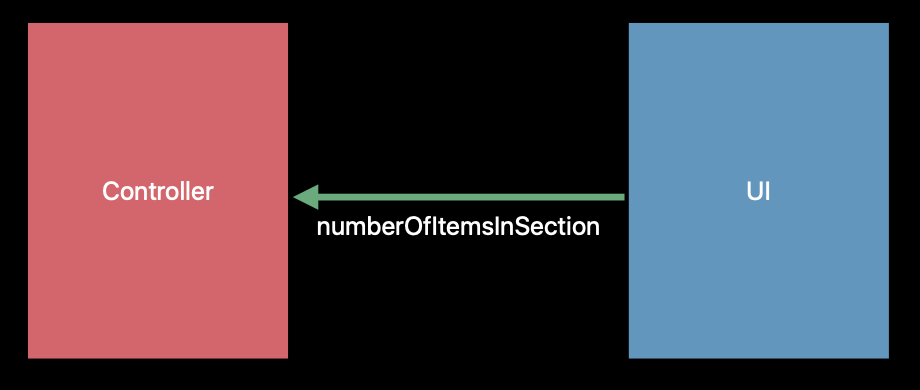
numberOfItemInSection
cellForItemAt 와같은 함수를이용해서

위의 형식처럼 컨트롤러에게 섹션이몇개니?
Cell이 몇개니?
Cell은 어떻게 생겻니?
물어보면서 설정했었죠
설정이후
서버통신을 통해서 데이터를 불러와서 다시 업데이트를 진행하는과정에서...
아래처럼 에러가 나기도하죠


WWDC를 보면서 피식하기도하네요 🤣
이러한 문제점을 잡아서 새로 나온 것이
Diffable Data Source
입니다!
무엇이 더 좋은가~?
TableView를 업데이트 하려했다면
beginUpdates를 사용하고
그다음 데이터를 수정하고
endUpdates로 마무리하는 방법을
사용했을 수 도있고
더 최근에 나온
performBatchUpdates
를 사용해서 업데이트 되는 효과를 줬을거에요
하지만
apply()
하나의 호출로
간단하게 자동으로 변경사항이 적용되도록 해줄 수 있어요

자동으로 애니메이션효과를 적용해주고
간단하고
빠르다!
어떻게 사용하는지 코드로 보겠씁니다~~
사용하는 클래스로는
NSDiffableDataSourceSnapshot
UITableViewDiffableDataSource 혹은 UICollectionViewDiffableDataSource
가 있지만
이 게시글에서는 테이블뷰만 다룰거에요
UITableViewDiffableDataSource
이것은 테이블뷰의 DataSource를 만드는 거구요
DataSource에 넣을 데이터가 있어야겠죠?
NSDiffableDataSourceSnapshot
이게 바로 그 데이터를 나타내는거구요
NSDiffableDataSourceSnapshot
데이터를 나타냅니다!
NSDiffableDataSourceSnapshot<Section, Item> 타입이구요
Section, Item 타입은 각각 Hashable를 준수해야해요

snapshot을 이용해서
테이블뷰와 컬렉션뷰에 데이터를 제공한다
snapshot을 통해서 상태를 생성하고
데이터를 뷰에 나타내고 나중에 데이터를 업데이트한다.
많은 함수를 가지고 있지만
필요할 것같은 함수만 골라봐보려구요
appendSections, deleteSections, insertSections
appendItems, deleteItems, insertItems
섹션을 추가하고 삭제하고 삽입하고
아이템을 추가 삭제 삽입하겠죠?
간단하네요 ㅎㅎ
이외에도

아이템들의 갯수
섹션 갯수
모든 섹션
모든 아이템
에 접근해볼 수 도 있구요
이제 이 데이터를 가공해서 적용시켜주는것이 남앗네요
UITableViewDiffableDataSource
테이블뷰에 적용할 때 사용하는거에요
적용은 apply()함수를 이용해요
간단하게 사용하기위해서
Section은 Int타입
Cell이될 Model은 UUID타입으로 지정했구요
dataSource = UITableViewDiffableDataSource<Int, UUID>(tableView: tableView) { (tableView, indexPath, uuid) -> UITableViewCell? in
    let cell = tableView.dequeueReusableCell(withIdentifier: "default", for: indexPath)
    cell.backgroundColor = self.colors[indexPath.row % self.colors.count]
    print(indexPath)
    return cell
}
dataSource에 변경하고싶은 속성을 변경해주고
저는 애니메이션효과를 바꿔봤구요
tableView의 dataSource에 넣어주고
초기상태의 snapshot을 만들어줬어요
무조건 처음엔 section 하나는 추가 해줘야해요
안하면 에러나니까 확인하고 하시구요 ㅎㅎ
3개의 cell을 넣어줬습니다
그리고 apply()!
apply에 snapshot을 넣어주면 잘 적용되는 원리라
수정된 데이터를 보여주려고 한다면 느낌이 조금 오시나요?
dataSource.defaultRowAnimation = .fade
tableView.dataSource = dataSource

// 빈 snapshot
var snapshot = NSDiffableDataSourceSnapshot<Int, UUID>()

snapshot.appendSections([section])
section += 1
snapshot.appendItems([UUID(),UUID(),UUID()])

dataSource.apply(snapshot)
데이터를 추가하는 동작을 구현해볼게요
현재상태의 snapshot(데이터)을 복사해서
섹션을 추가하거나 아이템을 추가한뒤
변경된 snapshot을 apply()시켜주면
자연스럽게 잘 변경이 일어나죠
이때 section이나 item에
중복되는 값이 들어가면(애초에 Hashable해야하므로 중복되면 안돼죠)
에러가 날 수 있으니 주의해주세요
그래서 저는 섹션을 1씩 증가시켰어요
@IBAction func append(_ sender: Any) {
    // 현재상태 snapshot 복사
    var curSnapshot = dataSource.snapshot()

    if isSection.isOn {
        curSnapshot.appendSections([section])
        // 아이템 넣어줘야 Cell이 증가함
        curSnapshot.appendItems([UUID()])
        section += 1
    } else {
        curSnapshot.appendItems([UUID()])
    }
    dataSource.apply(curSnapshot)

}
아래 코드는 insert!
원하는 위치에 넣는 작업이죠
위의 append는 뒤에 추가하는 작업이구요
insert를 하기위해선 section이라던가 item의 값을 알아야해요
snapshot에서 모든 section 혹은 item에 접근할 수 있어서
그방법을 이용했어요
append와 마찬가지로 insert도 section만 추가하면 티가안나고
item을 추가해줘야해요
하지만 section을 추가하면 실제로 데이터상의 section은 증가한거라
indexPath 주의하시구요
@IBAction func insert(_ sender: Any) {
    // 현재상태 snapshot 복사
    var curSnapshot = dataSource.snapshot()

    if isSection.isOn {
        curSnapshot.insertSections([section], afterSection: 0)
        section += 1
    } else {
        if let first = curSnapshot.itemIdentifiers.first {
            curSnapshot.insertItems([UUID()], afterItem: first)
        }
    }
    dataSource.apply(curSnapshot)
}
마지막으로 삭제 작업
삭제는 insert와 마찬가지로 삭제하려는 값을 알아야해요!
section을 삭제하면
section이 가지고있는 item모두 같이 삭제가 되는 점 유의해주세용
@IBAction func deleteSnapshot(_ sender: Any) {
    // 현재상태 snapshot 복사
    var curSnapshot = dataSource.snapshot()
    if isSection.isOn {
        section -= 1
        // Section 전체삭제
        curSnapshot.deleteSections([section])
    } else {
        if let lastItem = curSnapshot.itemIdentifiers.last {
            // Cell 하나삭제
            curSnapshot.deleteItems([lastItem])
        }
    }
    dataSource.apply(curSnapshot)
}
전체코드
class DiffableViewController: UIViewController {
    @IBOutlet weak var tableView: UITableView!

    private var dataSource: UITableViewDiffableDataSource<Int, UUID>!
    private var colors: [UIColor] = [.red, .orange, .cyan, .green, .blue, .brown, .darkGray, .purple]
    private var section = 0
    @IBOutlet private weak var isSection: UISwitch!

    override func viewDidLoad() {
        tableView.register(UITableViewCell.self, forCellReuseIdentifier: "default")

        dataSource = UITableViewDiffableDataSource<Int, UUID>(tableView: tableView) { (tableView, indexPath, uuid) -> UITableViewCell? in
            let cell = tableView.dequeueReusableCell(withIdentifier: "default", for: indexPath)
            cell.backgroundColor = self.colors[indexPath.row % self.colors.count]
            print(indexPath)
            return cell
        }

        dataSource.defaultRowAnimation = .fade
        tableView.dataSource = dataSource

        // 빈 snapshot
        var snapshot = NSDiffableDataSourceSnapshot<Int, UUID>()

        snapshot.appendSections([section])
        section += 1
        snapshot.appendItems([UUID(),UUID(),UUID()])
        dataSource.apply(snapshot)
    }

    @IBAction func append(_ sender: Any) {
        // 현재상태 snapshot 복사
        var curSnapshot = dataSource.snapshot()

        if isSection.isOn {
            curSnapshot.appendSections([section])
            // 아이템 넣어줘야 Cell이 증가함
            curSnapshot.appendItems([UUID()])
            section += 1
        } else {
            curSnapshot.appendItems([UUID()])
        }
        dataSource.apply(curSnapshot)

    }

    @IBAction func deleteSnapshot(_ sender: Any) {
        // 현재상태 snapshot 복사
        var curSnapshot = dataSource.snapshot()
        if isSection.isOn {
            section -= 1
            // Section 전체삭제
            curSnapshot.deleteSections([section])
        } else {
            if let lastItem = curSnapshot.itemIdentifiers.last {
                // Cell 하나삭제
                curSnapshot.deleteItems([lastItem])
            }
        }
        dataSource.apply(curSnapshot)
    }

    @IBAction func insert(_ sender: Any) {
        // 현재상태 snapshot 복사
        var curSnapshot = dataSource.snapshot()

        if isSection.isOn {
            curSnapshot.insertSections([section], afterSection: 0)
            section += 1
        } else {
            if let first = curSnapshot.itemIdentifiers.first {
                curSnapshot.insertItems([UUID()], afterItem: first)
            }
        }
        dataSource.apply(curSnapshot)
    }
}
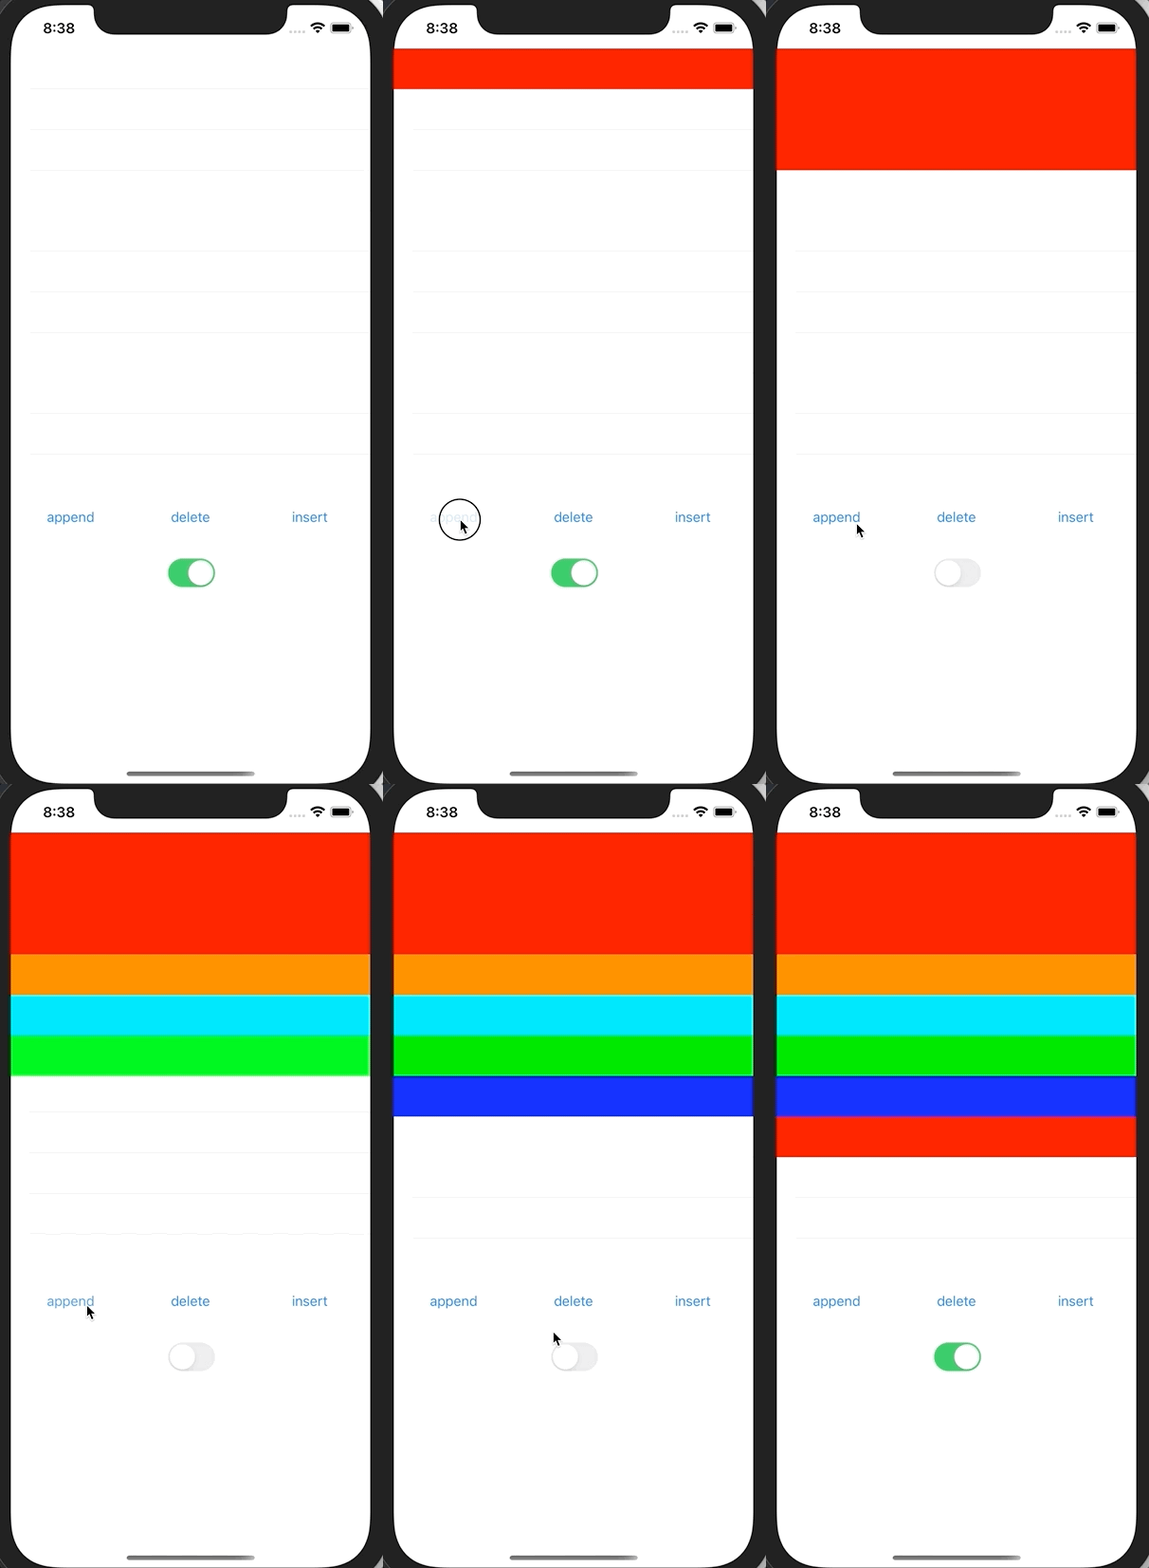
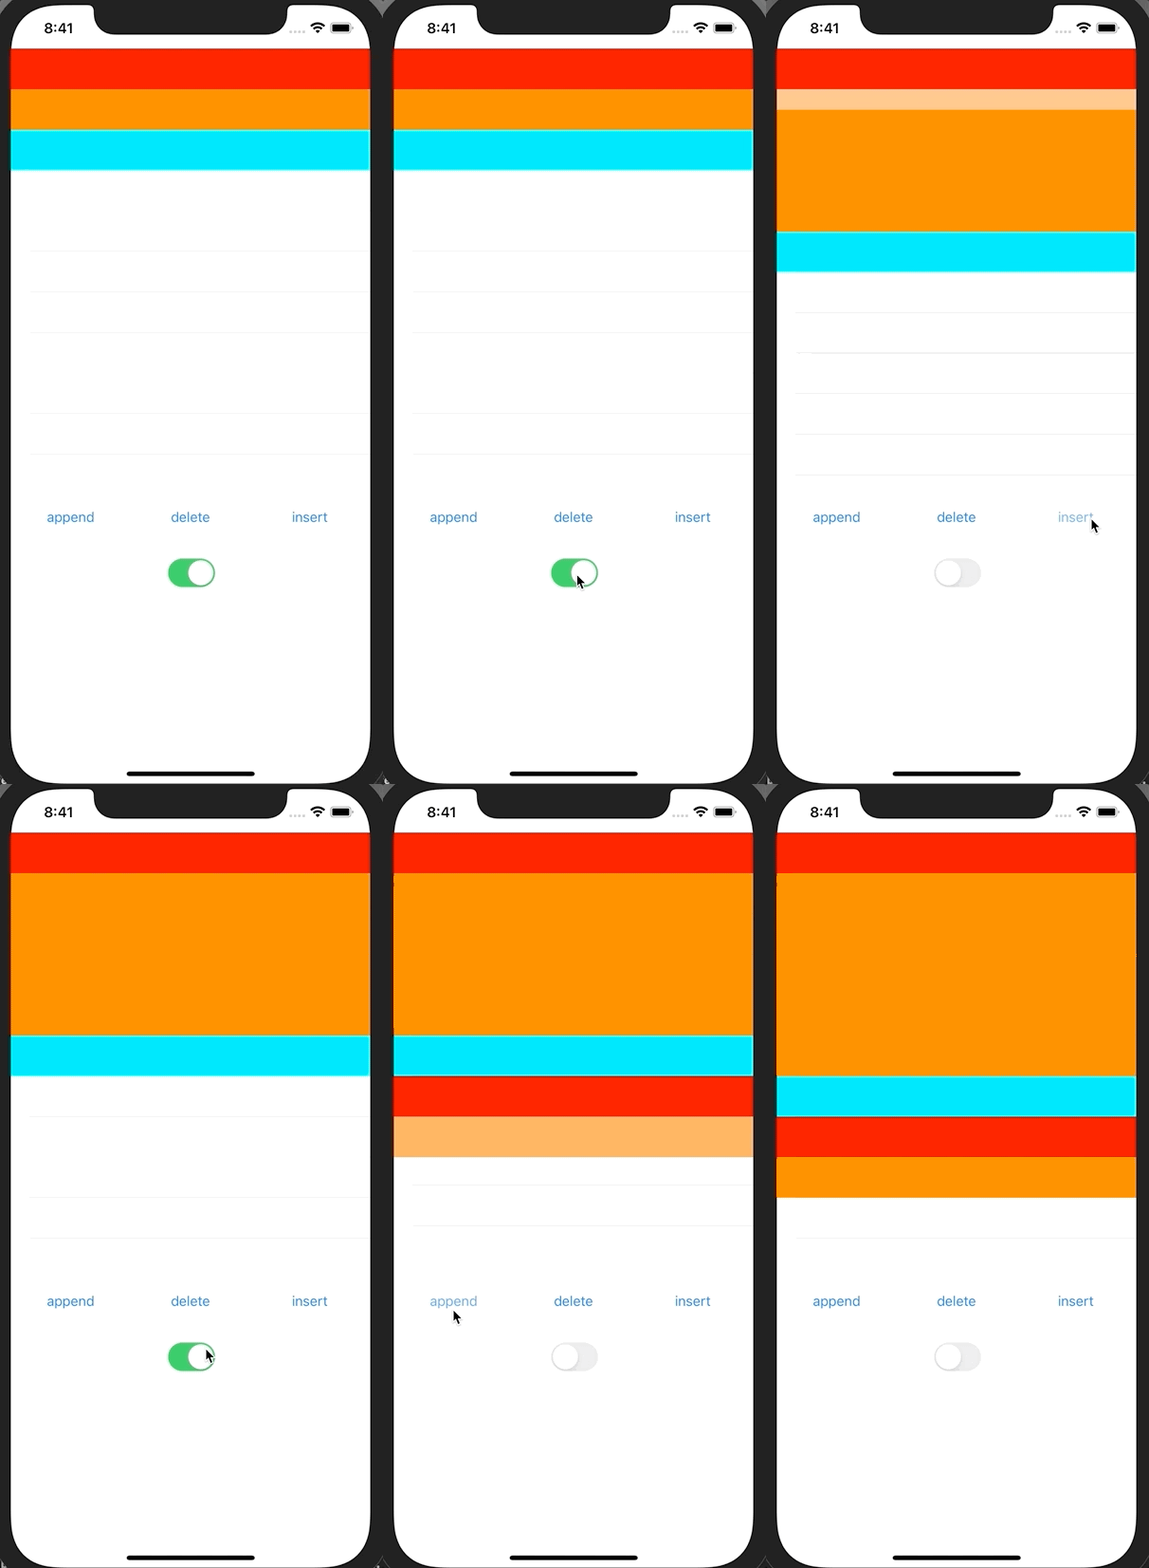
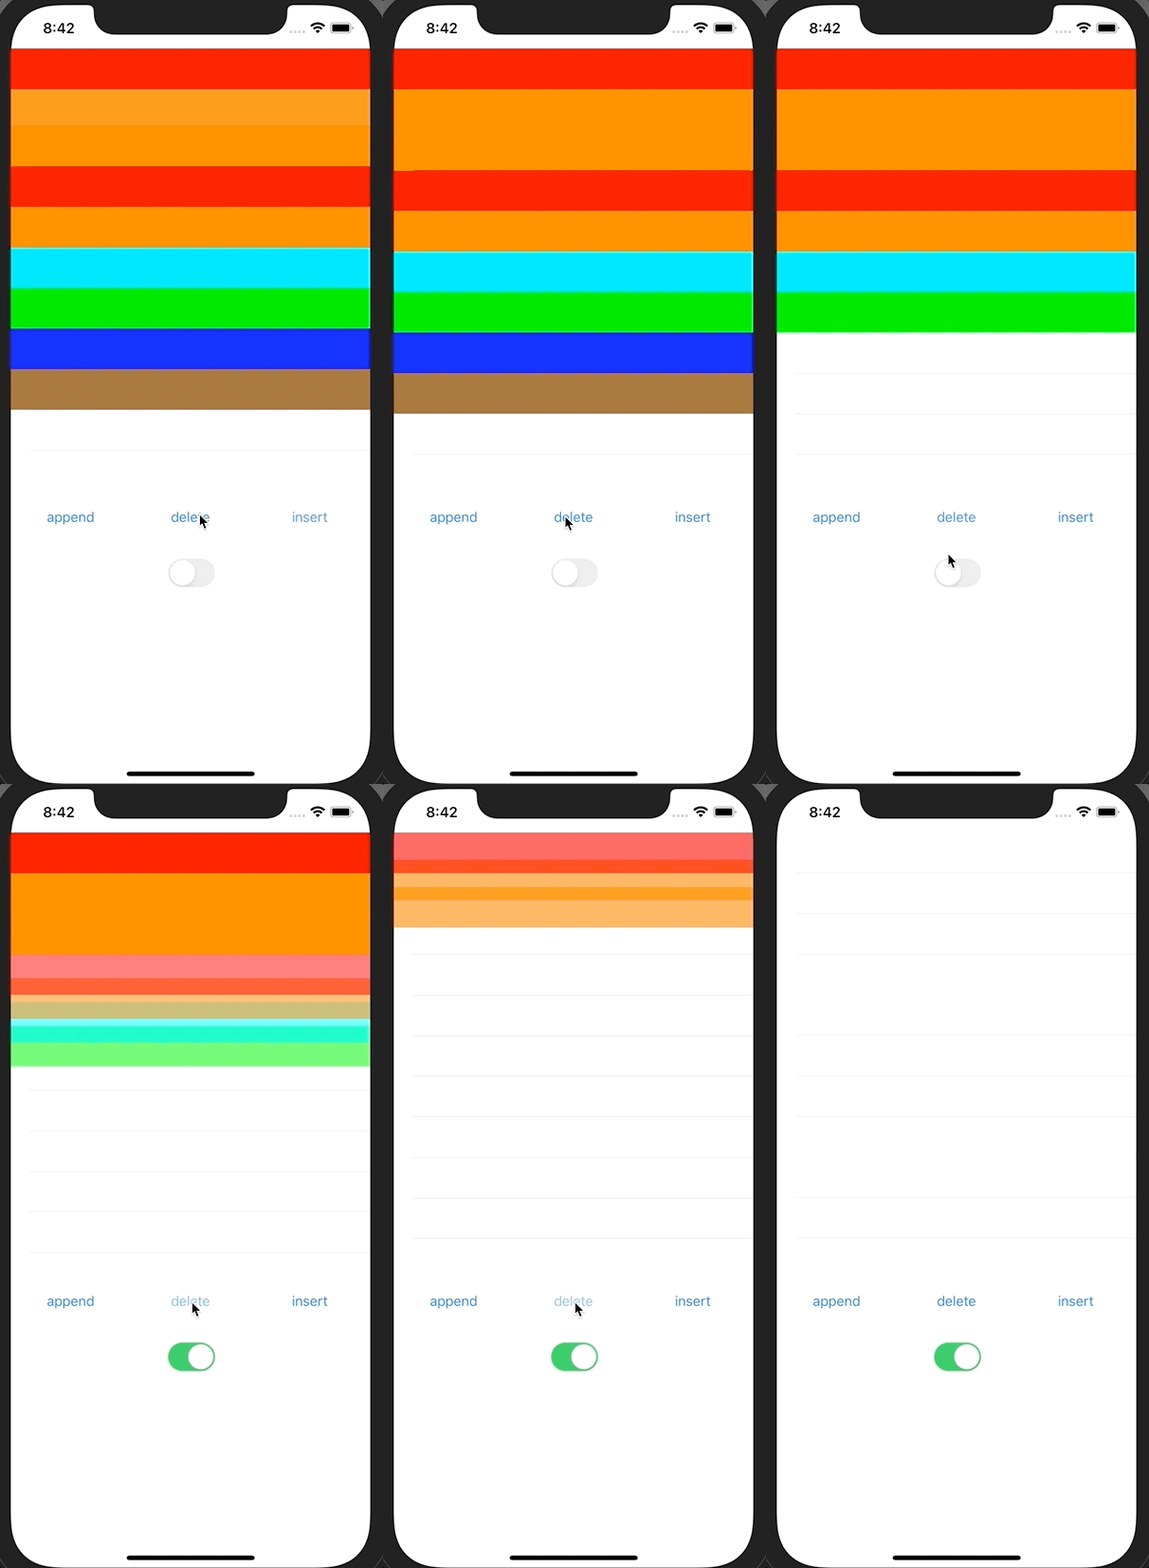
아래는 동작gif구요
스위치를 켠상태가 section단위를 표시해요
스위치를 키고 append라면 section을 추가하는 뜻이죠


왼쪽 append 가운데 insert 오른쪽 delete
'iyOmSd > Title: Swift' 카테고리의 다른 글
| [Swift] WWDC 21 Customize and resize sheets in UIKit (0) | 2021.06.28 |
|---|---|
| [Swift] Image Resize (5) | 2021.05.29 |
| [Swift] UICollectionViewCompositionalLayout (0) | 2021.04.27 |
| [Swift] 정규식으로 유효성 확인하기 (2) | 2021.03.20 |
| [Swift] TTS 텍스트 음성전환 (AVSpeechSynthesizer) (0) | 2021.02.23 |